Master Architectural Visualization & Start Earning as a Professional
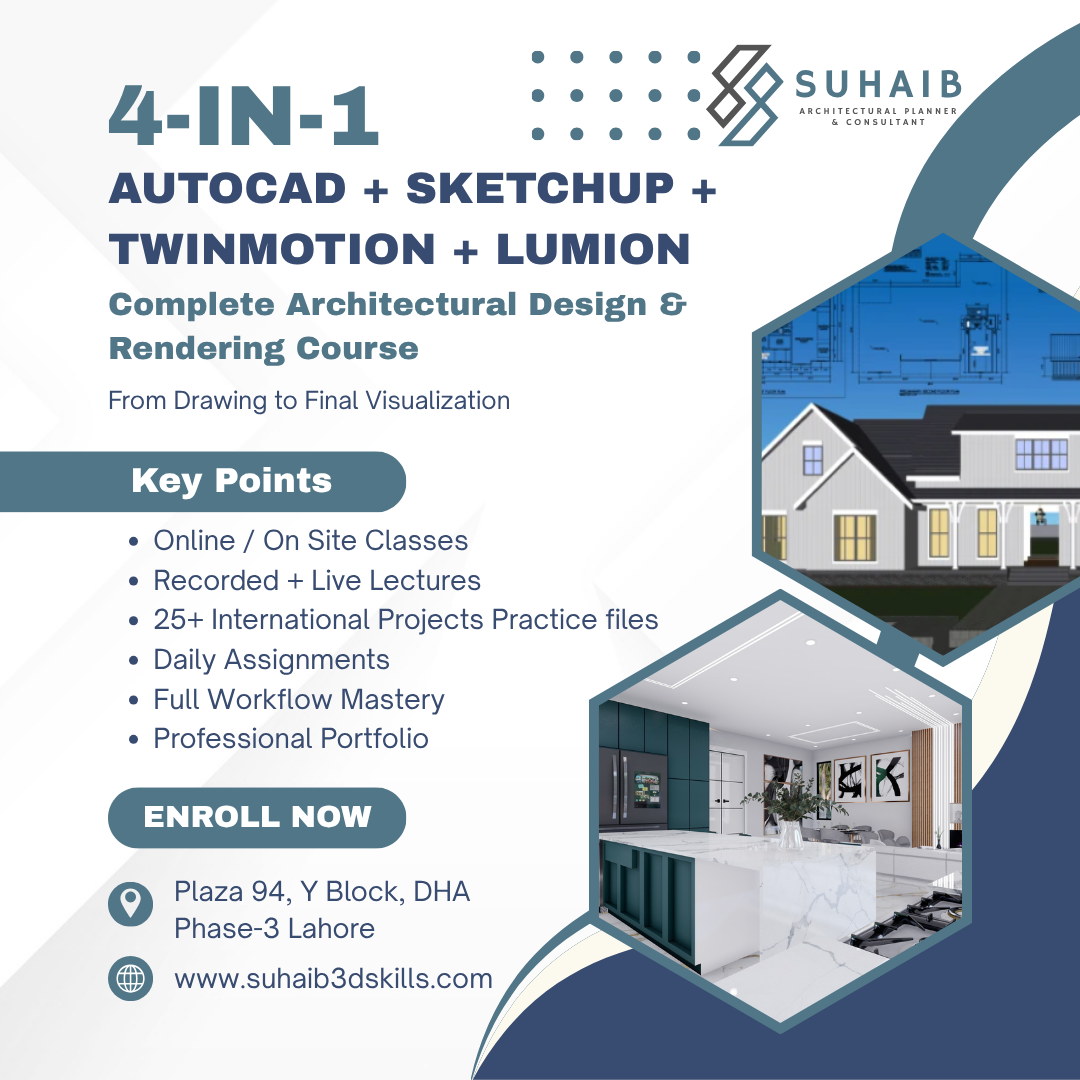
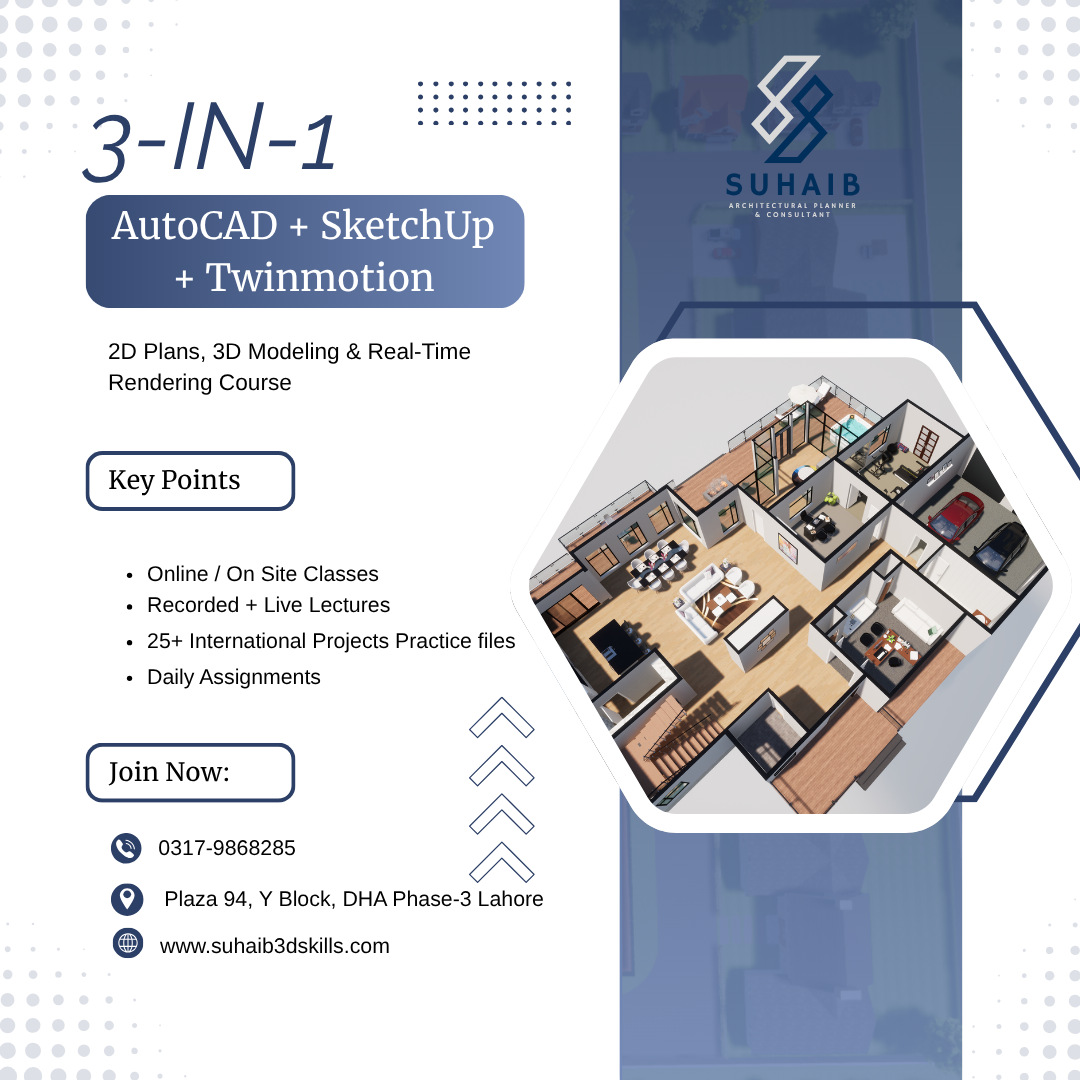
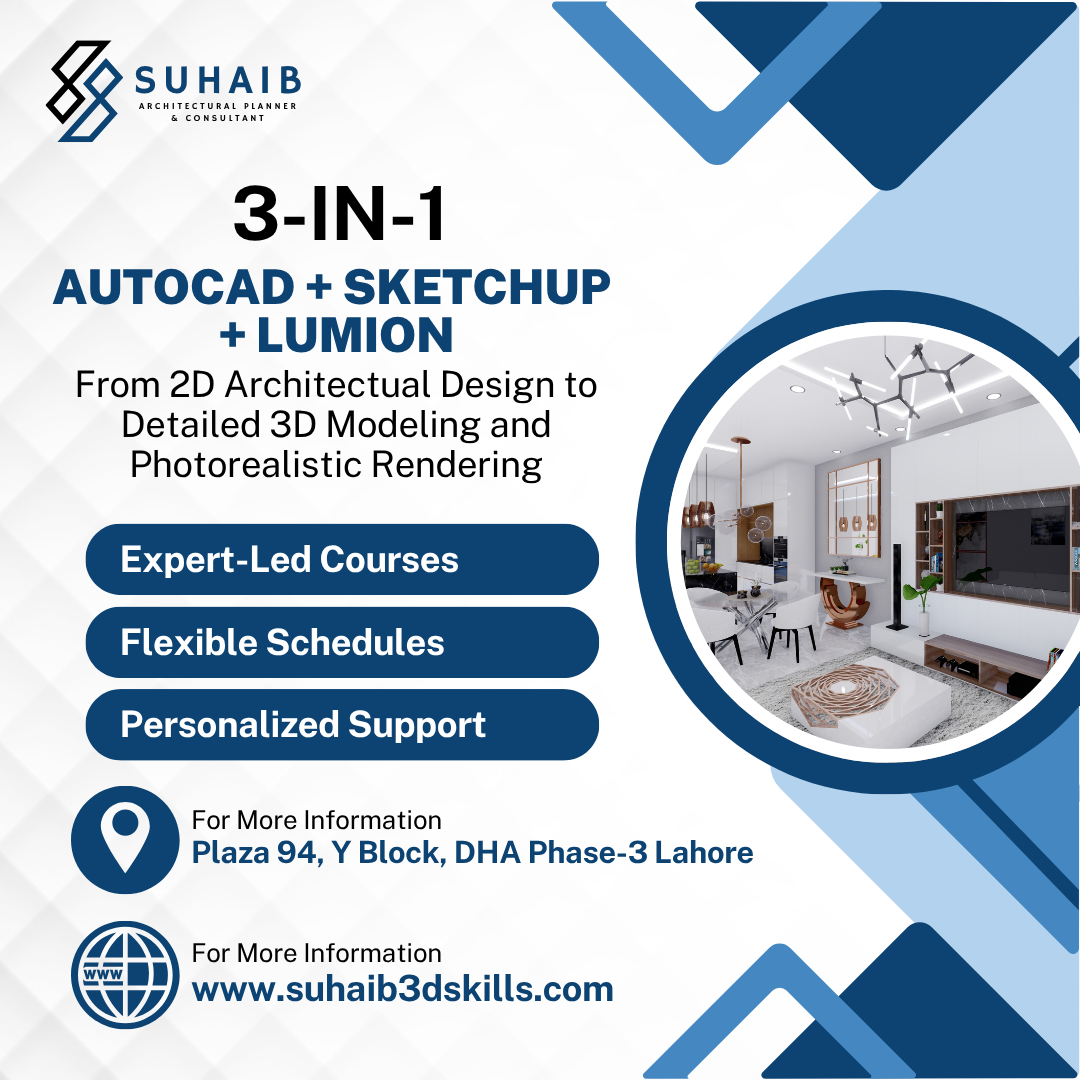
- AutoCAD
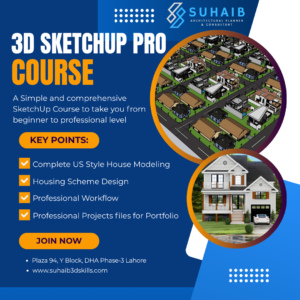
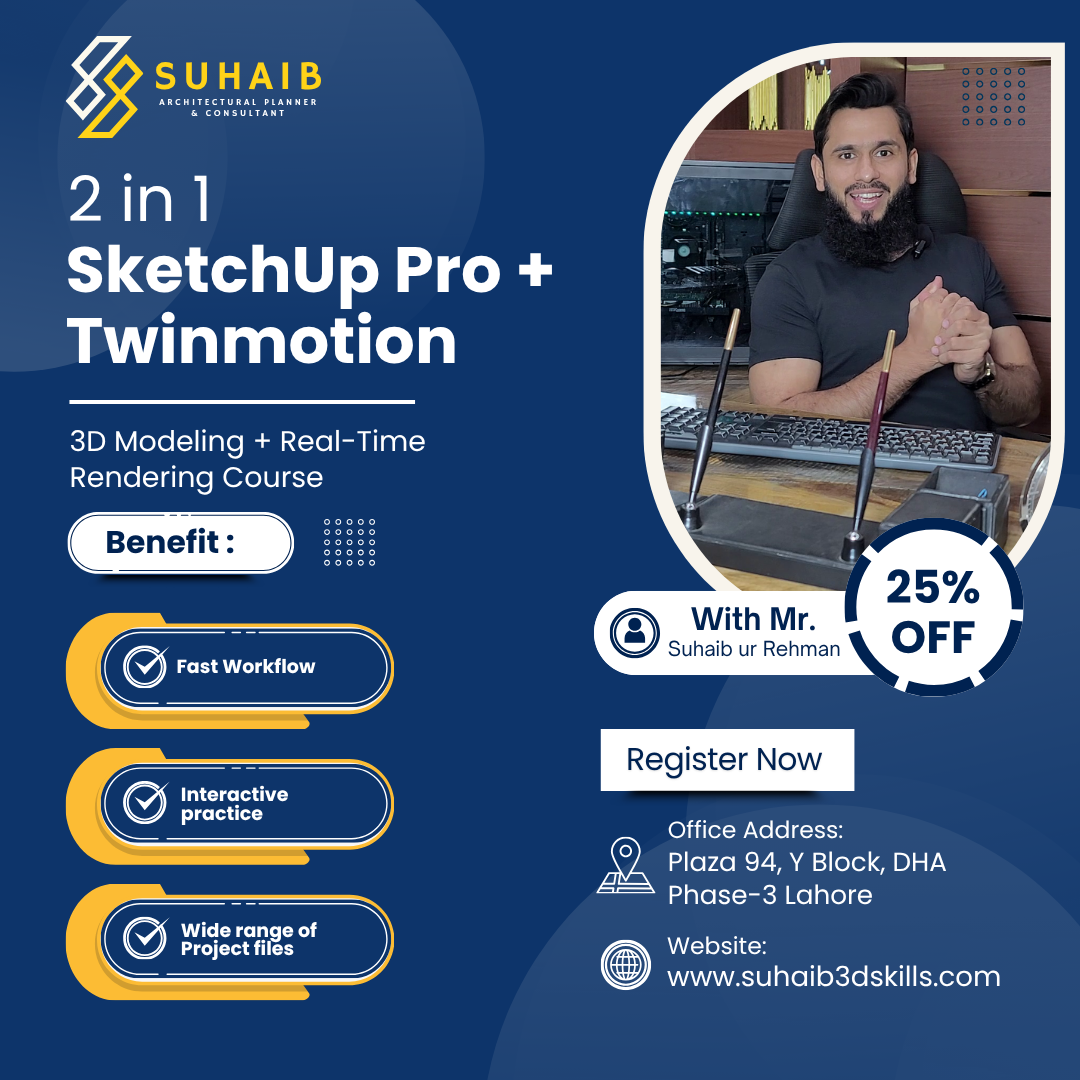
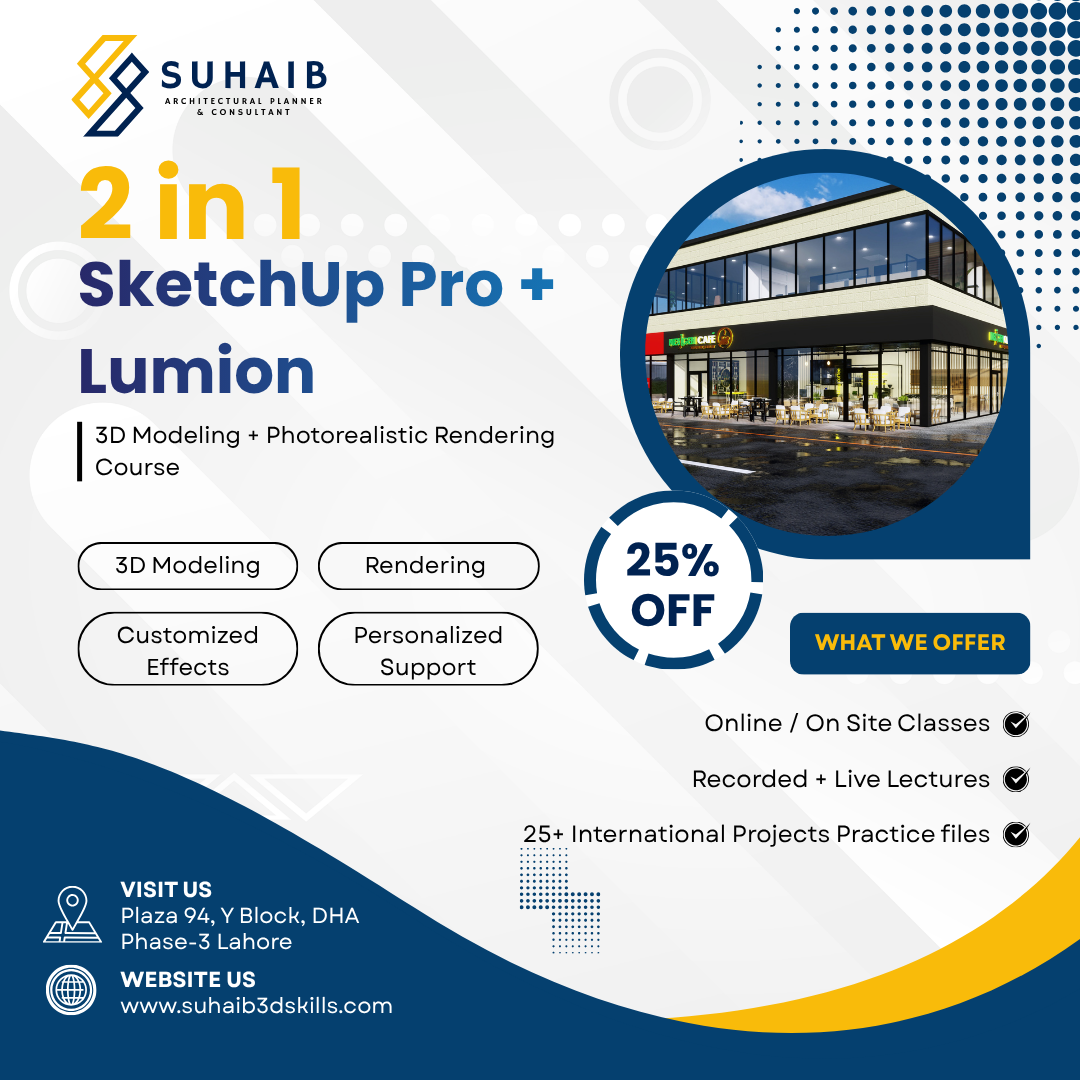
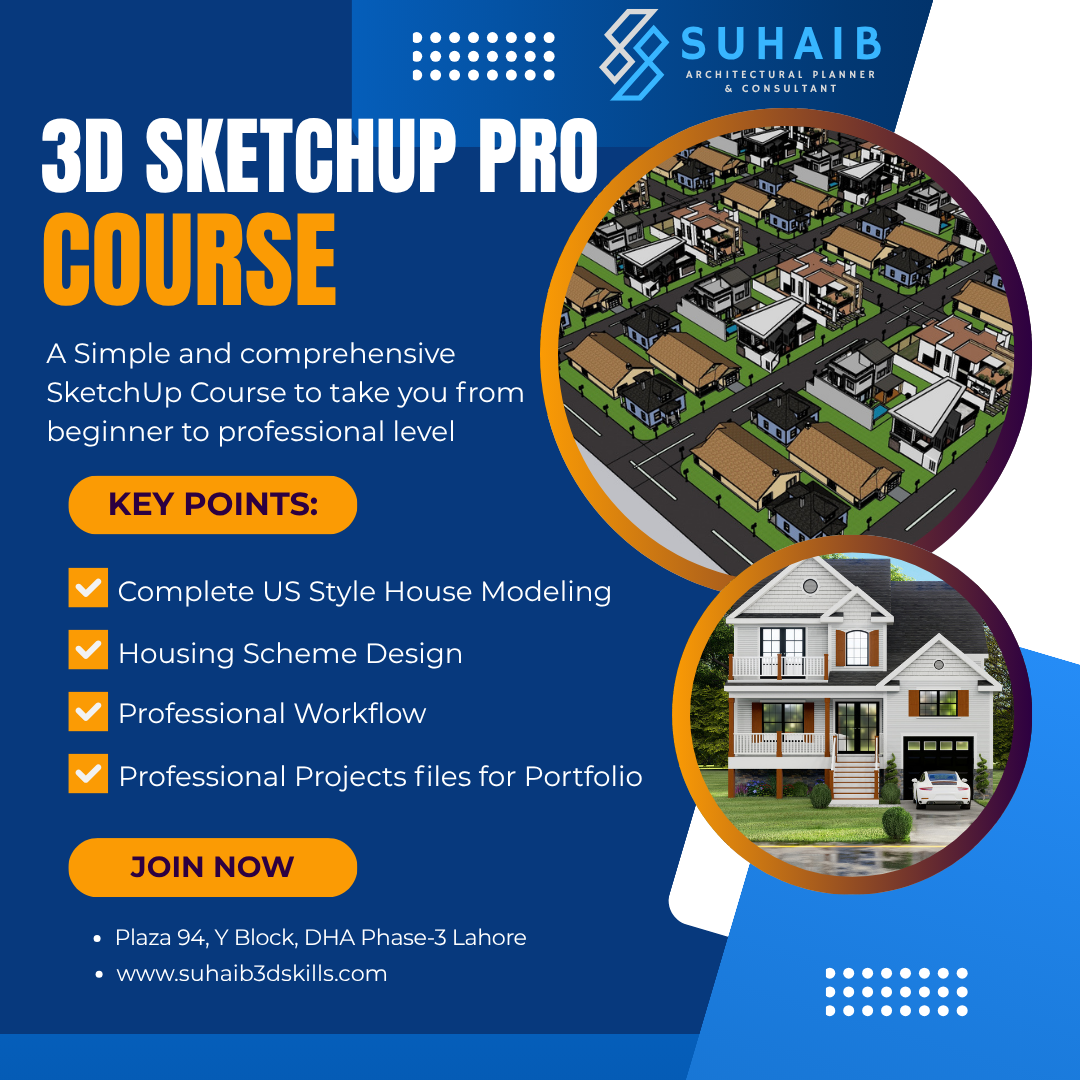
- SketchUp Pro
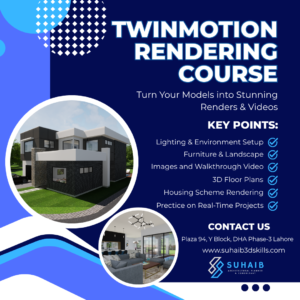
- Twinmotion
- Lumion
- Freelancing
Apply Now Today Upto 33% Discounted Prices


What students say about us ...
We have Helped 100+ students who have started their business, via working from home, with hours flexibility. Here are a few words from our students
"This course has been a game-changer for my career. I'm now able to visualize my designs like never before."
I've already landed a few freelance projects thanks to the skills I learned in this course. It's been a great investment in my future.
"The course not only taught me technical skills but also inspired me to think creatively. I've been able to use SketchUp to explore new design concepts and push the boundaries of my work."
"I was initially intimidated by 3D modeling, but the course broke it down into manageable steps. Now, I'm confident in my ability to create professional-looking designs."

About Instructor
Suhaib is the founder of Architecsol and lead instructor of the Architectural Visualization Masterclass. With over 7+ years of experience, he has successfully completed 1000+ projects for 1000+ international clients through platforms like Fiverr and Upwork. His expertise covers the complete workflow, including AutoCAD drawings, SketchUp modeling, Twinmotion real-time rendering, and Lumion photorealistic visualization.
His teaching approach focuses on practical, real-world training, helping students not only learn software but also understand professional workflows, build strong portfolios, and deliver client-ready projects. Through this program, students gain the skills and confidence to start freelancing and earn online.
AutoCAD Outline
- Introduction of the AutoCAD.
- Uses of the software.
- Downloading and Installation
- Interface
- Site Plan
- Floor Plans (Walls, Doors, Windows, Garage Doors, Beams, Cabinets, Furniture, Sliding Doors and Measurements)
- Understanding Elevations with respect to floor plans
- Section Drawings
- Electrical Drawings
- Other Drawings (Roof framing drawing, foundation plan, interior elevations or Cabinets drawings)
- Setting Units
- Setting Dimensional Style and Units
- Line tool
- ORTHO
- OSNAP
- Measurements
- Join and Explode
- Rectangle
- Arc Circle
- Ellipse
- Importing PDF or JPG file
- Scale
- Align
- Blocks
- Tracing
- Extent
- Fillet Chamfer
- Trim
- Erase
- Offset
- Mirror
- Move
- Copy
- Rotate
- Doors Block
- Windows
- Layers
- Match property
- Text and Types
- Hatch
- Gradient
- Adding Furniture
- Importing Blocks
- Measurements
- Dimensional Style
- Working in Different Units like mili meter
- Standards of Kitchen Cabinets or Bath Vanity
- Layout
- Printing/PDF
- Understanding Relation between Drawings
- Customised Modifications in Provided CAD file
SketchUp Outline
- Introduction of the sketchup pro.
- Uses of the software.
- Downloading and Installation
- Interface
- Line tool
- Shapes tool
- Push and Pull tool
- Arc Tool
- Zoom in and zoom out tool
- Offset tool
- Measurement and units tool
- Move tool
- Eraser tool
- Pan and look around the tool.
- Standard camera views
- Rotate tool
- Scale tool
- Paint tool.
Zoom Selection tool
- Making the groups
- Making the components
- Applications of the groups and components
- Difference between groups and components.
- Divide
- Intract faces with model
- Multiple copies X and /
- Follow me
- Straight stairs, Free standing stairs, L shaped stairs, U shaped stairs.
- Import of different format files.
- Exporting model in different formats.
- Use of Skp warehouse.
- Creating scenes of different points.
- Exporting images and videos.
- Two ways of making walls on 2D plans.
- Use and benefits of tags or layers.
- Methods of cutting windows and doors on walls.
- Importing and placing windows and doors between the walls.
- Importing and placement of fixtures and furniture from SKP warehouse.
- Scaling the furniture according to the space.
- Making slabs or ceilings on walls
- Creating the flat roof with parapet walls on the border of the house.
- Formation of inclined roofs with an angle and use of intersect faces tool.
- 8 different extensions to create model quicker:
- profile builder, shape render, freedo tools, True Bend, Maj Window, Maj Rail, Maj Stairs,1001bit tools
- These extensions will be a special surprise for those who will join the course.
- Making of different walls around the house.
- Landscaping around the buildings.
- Swimming pool designing
- Standard Road and driveway or pathway designing.
Lumion Outline
- Introduction or Scope of Lumion 10.5
- System Requirements (GPU importance)
- Download & Installation
- Setting up Lumion
- Installing SketchUp Plugin (LiveSync)
- First Project Setup
- Lumion Interface Overview
- Navigation Controls (Move, Orbit, Walk)
- Import Panel
- Materials Panel
- Landscape Tools
- Lighting Tools
- Layers System
- Weather Settings
- Effects Panel
- Export & Render Tools
- Importing SketchUp Model
- Using LiveSync Plugin
- Adjusting Model on Ground
- Scaling & Positioning
- Managing Model Layers
- Adjusting Terrain
- Adding Grass
- Sky & Weather Control
- Sun Positioning
- Background Setup
- Applying Materials to Model
- Glass, Concrete, Wood, Metal
- Interior Materials
- Texture Scale Adjustment
- Reflection & Gloss Settings
- Using Lumion Material Library
- Creating Custom Materials
- Editing Advanced Material Settings
- Saving Materials as .LNM Files
- Reusing Materials in Projects
- Furniture Placement
- Interior Design Setup
- Adding People & Characters
- Adding Cars & Props
- Landscape Design (Trees, Plants)
- Scene Composition
- Creating Photo Scenes
- Camera Angles & Composition
- Creating Video Scenes
- Walkthrough Animation
- Path Animation
- Scene Transitions
- Using Built-in Effects
- Realistic Lighting Effects
- Reflection Effects
- Shadow Settings
- Sky & Atmosphere Effects
- Depth of Field
- Color Correction
- Image Rendering Settings
- Video Rendering Settings
- Output Quality Optimization
- File Formats
- Exporting Final Media
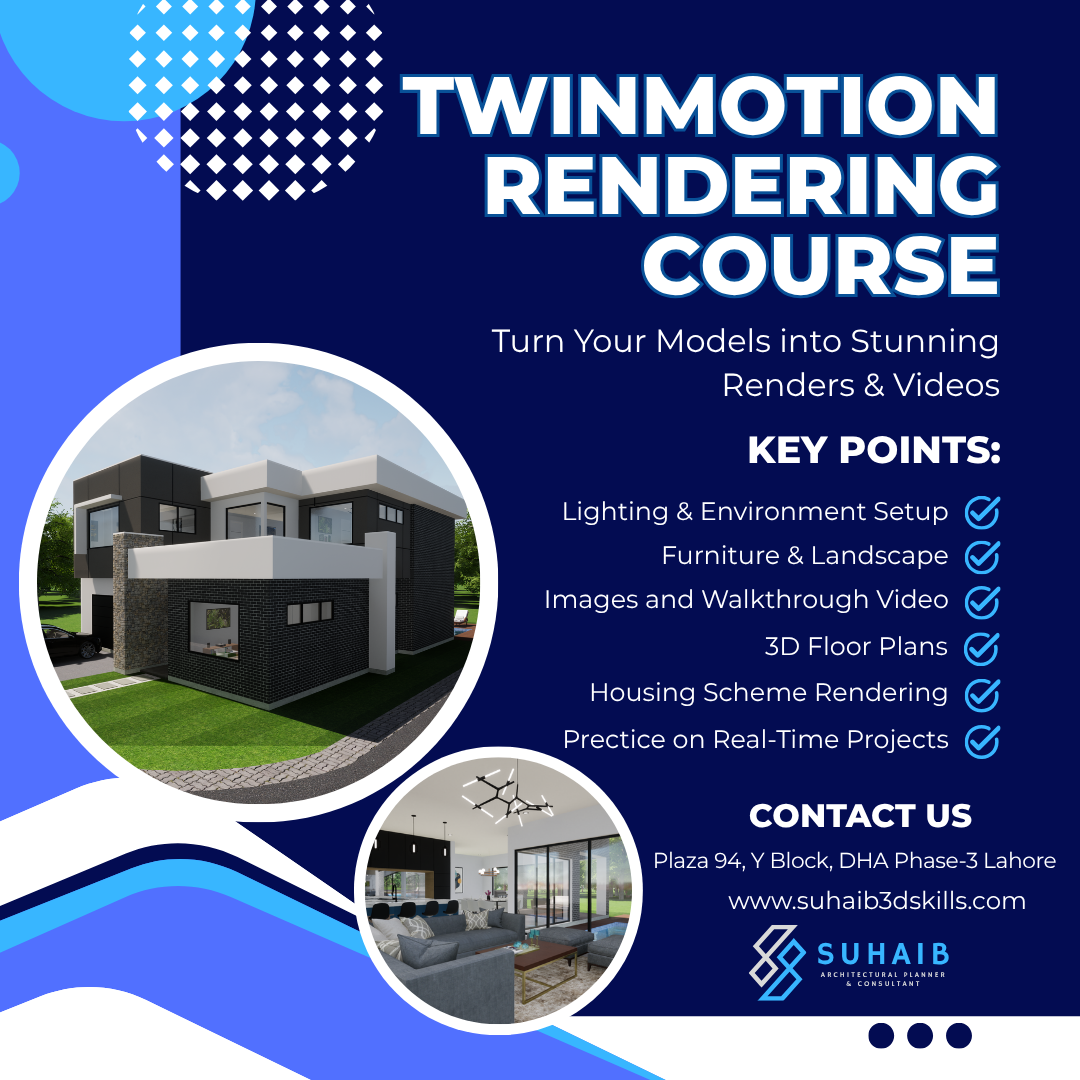
Twinmotion Outline
- How to use Twinmotion renders for Fiverr or Upwork clients
- System Requirements & Optimization
- Creating an Epic Games Account
- Downloading and Installing Twinmotion
- Installing Twinmotion Plugin for SketchUp
- Understanding Twinmotion File Structure
- Setting up the first project
- Introduction to Twinmotion Interface
- Viewport Navigation & Camera Controls
- Understanding the Toolbar
- Scene Graph (Objects & Containers)
- Materials Library
- Objects Library
- User Library
- Import / Export Panel
- Settings Panel
- Media Dock
- Importing SketchUp Model into Twinmotion Using Direct Link Plugin
- Import Settings
- Updating Models from SketchUp
- Organizing Scene Using Containers
- Preparing Model for Visualization
- Ground Setup
- Applying Grass
- Sun & Lighting Adjustment
- Weather Settings
- HDRI Background
- Environment Control
- Basic Materials for Preview
- Using Twinmotion Furniture Library
- Importing Custom Objects
- Creating a Personal User Library
- Saving Materials to User Library
- Saving Objects to User Library
- Reusing Assets in Future Projects
- Interior Furniture Planning
- Room-wise Furniture Placement
- Working with Containers for Floors
- Rotating, Scaling, and Moving Objects
- Aligning Objects Precisely
- Interior Furniture Planning
- Room-wise Furniture Placement
- Working with Containers for Floors
- Rotating, Scaling, and Moving Objects
- Aligning Objects Precisely
- Applying Materials to Furniture
- Adjusting Texture Scale
- Reflection & Roughness Settings
- Wood, Fabric & Metal Materials
- Creating Custom Furniture Materials
- Applying Materials to Walls, Floors & Ceilings
- Customizing Materials
- Using PBR Materials
- Replacing SketchUp Materials
- Applying Custom Textures
- Creating Camera Angles
- Creating Image Scenes
- Creating Video Scenes
- Creating Panorama Scenes
- Storytelling with Cameras
- Image Rendering Settings
- Video Rendering
- Panorama Rendering
- Optimizing Render Quality
- Introduction to Twinmotion Cloud
- Uploading Projects
- Sharing Projects with Clients
- Creating Online Presentations
- Web Viewer Navigation
- Setting for 3D floor Plans
- Rendering 4K resolution 3D floor plan images
- 3D floor Plan walkthrough video creation
- Rendering Elevations
- Exterior Lighting Setup
- Landscape Enhancement
- Vegetation Placement
- Rendering a Single Room
- Interior Lighting Setup
- Interior Camera Settings
- Interior Walkthrough
- Texturing a Neighbourhood
- Vehicle and Characters pathway
- Vegetation
Freelancing Outline
- What is freelancing?
- Fiverr vs Upwork (difference)
- Market demand for architectural visualization
- Choosing your niche:
- Exterior rendering
- Interior rendering
- Walkthrough
- ugh animation
- Creating Fiverr account
- Profile setup (SEO optimized)
- Writing professional bio
- Profile image & branding
- Skill tags optimization
- Why intro video matters
- Script writing
- What to show (before/after renders)
- Recording tips (mobile setup)
- Editing simple intro video
- Gig title (SEO optimized)
- Gig description (conversion focused)
- Pricing packages (Basic / Standard / Premium)
- Gig FAQs
- Gig requirements
- Fiverr Promoted Gigs (ads system)
- When to enable ads
- Budget strategy
- Ranking algorithm basics
- Gig optimization over time
- What are Fiverr Briefs
- How to respond to briefs
- Writing winning proposals
- Increasing response rate
- First message strategy
- Asking correct questions
- Closing deals
- Handling revisions
- Managing difficult clients
- First 5 orders strategy
- How to get 5-star reviews
- Delivery techniques
- Fast delivery advantage
- Increasing prices
- Creating multiple gigs
- Niche specialization
- Building repeat clients
- Creating Upwork account
- Profile optimization
- Professional headline
- Overview writing
- Portfolio setup
- How Upwork works
- Writing winning proposals
- Hook strategy (first 2 lines)
- Personalization techniques
- Job search strategy
- Filtering high-quality clients
- Avoiding scams
- Connects strategy
- Interview handling
- Pricing negotiation
- Building trust
- Converting to long-term clients
Why 3D Modeling & Rendering?
A detailed compression between 3D designing, digital marketing and graphic designing.
3D Modeling & Rendering
-
Easy to learn
-
Less saturated market
-
Top Paying Clients
-
Repetition of clients
-
Bigger Salary
-
Shorter Time Projects
-
Less Creativity
-
Static Trend
Digital Marketing
-
Easy to learn
-
Less saturated market
-
Top Paying Clients
-
Repetition of clients
-
Bigger Salary
-
Shorter Time Projects
-
Less Creativity
-
Static Trend
Graphic Designing
-
Easy to learn
-
Less saturated market
-
Top Paying Clients
-
Repetition of clients
-
Bigger Salary
-
Shorter Time Projects
-
Less Creativity
-
Static Trend
4 Ultra Pro Max Bonuses
If you enroll today, you will also get Mentorship + BONUSSES
Lifetime LMS With Updated Recordings
You will get lifetime access to the LMS and updated future recording
Hands on Experience with International Projects
An Opportunity To Work on International and National Projects to build Portfolio.
Access to Private FB Community
You will Get Instant Access To The Private Facebook Support Community To Engage With Others
Access to Unlimited 2D Plans and 3D SketchUp models
You will get multiple 2D plans and 3D models that I already have prepared for international clients in a paid project to build your portfolio.
COURSE PACKAGES
There is Special Discount for Those Who will Enroll with 5 in 1, 4 in 1, 3 in 1 or 2 in 1 Packages.


What you can Do After Each Course?
Endless Ideas & Opportunities to open multiple Income Streams after doing each Course
Freelancing
You Can Start A high paying Freelancing career with free or paid marketing & Sell your services online!
Freelance Business
Your very own local business to sell any services or experience online!
Collaboration with Market
You can work with us or other freelancers on a project basis remotely.
Job Opportunity
You can work with any architectural agency or you can join our agency as an employee.
Dear Pakistanis, Take Advantage of the 100% Money Back Guarantee right now!
How this works: Attend the first live class and if you are not 100% satisfied, just ask us for the refund before the 2nd live class and we will refund 100% of your fee in 2 business hours without any questions asked.
-No Extra Charges-
Frequently Asked Questions
Yes we offer on site Classes too. You can always visit our office at Plaza 94 Y Block DHA Phase-3 Lahore.
Suhaib 3D Skills is the Pakistan’s first ever To The Point Best 3D Architectural Training System in Pakistan where anyone (male, female, students, housewives, employees, business owners, job holders, or anyone) can learn and start 3D Based Freelancing, 3D Services Business & 3D based Job.
There are Recorded Lectures and also there will be Live classes every week to resolve all issues that students will face in recorded lectures. Also there will be multiple assignments after each class.
The duration of the complete training for each Course is in between 45 –60 days.
There are no prerequisites for taking the training. Anyone can do it with zero knowledge in the field. Although for Lumion and Twinmotion Courses you will need SketchUp Course first with high end GPU in your Computer at least 6 GB.
All courses contain 100% Money Back Guarantee until the 2nd Live class. Take the 1st live class and if you don’t like it, then you can ask for a 100% refund before the 2nd live class.
It is conducted on Zoom so that anyone can take it easily and effortlessly.
There are 3 Support Methods for the students to get support for possibly the best experience. You get a WhatsApp Chat Support + Email Support + FB Community Support to help and guide as much as possible. There is also a Mentorship Support when you get to start your business.
Once you pay your training fees in official account only, take the screenshot and share it on pay@suhaib3dskills.com and share it on WhatsApp 03179868285 as well for verification.
Once you invest on yourself by paying your training fees, you take a screenshot and share it on pay@suhaib3dskills.com for verification. The team verifies your screenshot in 06 – 12 business hours. You will receive an email, WhatsApp, and Call from the team for the LMS Access.
Want to receive push notifications for all major on-site activities?